Road Noise Check: How to Find a Quiet Residential Location
A residential location can seem quiet during a viewing and then turn out to be permanently noisy after you move in. This guide shows how to assess road noise systematically in advance, from identifying typical noise sources and doing on-site checks at different times of day to interpreting road-noise maps. That way, renters and buyers make a decision based on clear indicators instead of chance.
12.03.2026
Why Road Noise Is So Often Underestimated When Looking for a Home
Road noise is tricky because it rarely feels like a single, clearly identifiable sound. More often it is a constant background layer that pushes its way into everyday life: when falling asleep, concentrating on work, talking on the balcony, or playing with children. At the same time, noise is highly situation-dependent. A street can seem harmless in the morning and become much more present in the evening through commuter traffic or at night through taxis, emergency vehicles, or deliveries. On top of that, there is a typical viewing effect. During a viewing, people focus on layout, condition, light, sightlines, and price. The brain tends to tune out background stimuli, especially if you are only on site briefly. That is exactly why a structured road-noise check is worthwhile: it brings order to something that would otherwise remain just a feeling. One shift in perspective matters here. The goal is not absolute silence, which is unrealistic in many locations, but a noise situation that fits your own use case. Families pay attention differently than singles, home-office users differently than commuters, and investors differently than owner-occupiers. The check helps translate those differences into clear criteria.
- ✓ Do not assess only the moment of the viewing. Think in typical daily and weekly patterns.
- ✓ Define what quiet enough means for you: sleep, home office, children’s room, balcony.
- ✓ Treat noise as a location characteristic that is hard to change, which is why it should be checked early.
Step 1: Identify Noise Sources in the Surroundings Before You Even Visit
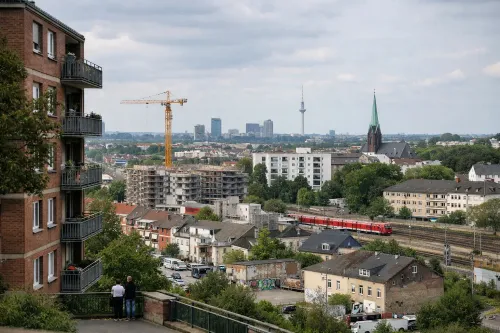
The fastest lever is a desktop analysis of the surroundings. The goal is not to complete the whole assessment but to spot red flags early so you use viewing time efficiently. Typical road-noise drivers are, first, major traffic axes and feeder roads, which create constant traffic hum and often remain active into the evening. Second, intersections, junctions, ramps, and turning lanes, where extra impulses such as braking, accelerating, and starting up can feel more disturbing than steady traffic flow. Third, bus routes and through-routes. Even without a motorway, a heavily used route can create significant noise levels. Fourth, short but recurring peaks from delivery zones, garbage collection, or taxi stands. These are rarely visible reliably during a short viewing. A practical approach is to think in two rings: the immediate surroundings, meaning the street segment and nearest block edge that directly affect the apartment, and the wider neighborhood, meaning the larger roads that shape the area. This is exactly the logic often used in road-noise maps, because the immediate setting affects windows and balconies directly, while the broader neighborhood shapes the background noise and the overall sound backdrop.
- ✓ Look for axes and junctions, not just motorway yes or no.
- ✓ Check two rings: the direct street effect at the windows and the broader neighborhood pattern.
- ✓ Think about recurring peaks such as deliveries, garbage pickup, and taxis, and verify them on site deliberately.
Step 2: Do the On-Site Check Properly So You Do Not Overlook Noise
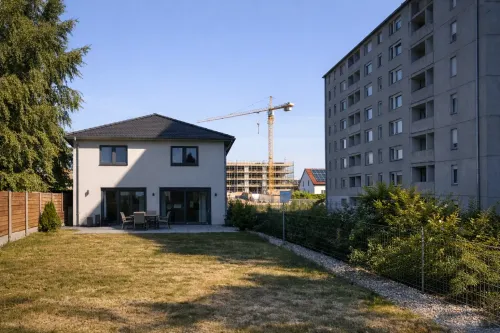
An on-site check is useful only if you treat it like a small test plan rather than a walk around the block. Three principles help most. First, use multiple time points. If possible, cover at least two time windows. A classic combination is daytime plus evening. For sensitive uses such as children’s rooms, light sleepers, or home office, a short stop during a typical peak time is also useful. Second, compare outside and inside. Noise affects the entrance area and the balcony differently from the interior. Indoors, the key is not only loud versus quiet, but whether the sound comes through as a steady hum or as sharp impulses such as starting engines, sirens, or mopeds. Impulsive noise is often perceived as more disturbing. Third, check the window logic. What matters is which side the main living rooms face. An apartment can sit in a noisy area and still work very well if the bedrooms face the courtyard. Conversely, an apartment in an otherwise calm area can be unpleasant if it sits directly on a small but heavily used bottleneck. One concrete tip is to stand still for two or three minutes without speaking. If you intuitively feel relief as soon as you step a few meters away or into the stairwell, that is a sign of relevant noise exposure. For investors or landlords, an additional question helps: how do tenants typically use the apartment, such as balcony, bedroom, or home office? Noise becomes a letting risk when it restricts actual use, not only when it is measurable.
- ✓ Plan at least two time windows, for example daytime plus evening or a peak period.
- ✓ Separate outside from inside and consciously distinguish steady background noise from impulses.
- ✓ Check the orientation of the main rooms. Street side versus courtyard is often the game changer.
Step 3: Understand Road-Noise Maps and What the Visualization Really Says
Road-noise maps are helpful when you read them as pattern recognition. In the report, road noise is described as a map model that visually represents potential noise levels across an area. It is based on information such as speed limits, road types, and building data, in other words factors that shape expected traffic volume and sound propagation. Typical elements of the visualization are, first, a color-coded surface that shows the burden in classes, for example from very low to very high. These classes are especially useful because they make comparison between addresses easier. You can see at a glance whether a location sits in a high zone or in quieter bands. Second, there are two scale levels. One map covers the immediate surroundings around the address, meaning what directly affects windows and balconies, and another map shows the broader noise picture of the neighborhood. This is more than just zoom. It separates the question of how loud it is directly at the building from the question of how the area feels overall. Third, hotspots usually appear along traffic axes, often as clear corridors along major roads. For interpretation, the question is not only whether such an axis exists, but how close it is to the address and whether a shielding effect, such as perimeter blocks or building rows, is plausible between the axis and the apartment. When reading the map, ask three questions: first, is the address in a burden class that I basically accept? Second, which direction is problematic, for example a traffic axis west of the address, and does that direction match the window side of my apartment? Third, is the noise situation spread across the area or mainly corridor-like along one axis? Corridors can sometimes be compensated for better through apartment orientation than area-wide burden can. One thing matters: map models usually show modeled, potential burden. That makes them ideal for comparison and preselection, and they should then be complemented with on-site impressions.
- ✓ Read color classes as a comparison tool, not as exact truth.
- ✓ Interpret immediate surroundings and neighborhood separately: house effect versus district backdrop.
- ✓ Distinguish corridor-like burden from area-wide burden, because that changes your options.
The Most Common Misinterpretations, and How to Avoid Them
The same thinking mistakes appear again and again with road noise. Mistake one: if the street is small, it must be quiet. Small streets can be heavily burdened as shortcuts or cut-through routes, especially at peak times. Mistake two: inner city means loud, outskirts mean quiet. There are very calm inner locations such as courtyards and traffic-calmed zones, and very loud fringe locations along feeder axes. A map helps make those exceptions visible. Mistake three: it was fine during the day. Many disturbance patterns appear only in the evening or at night: traffic becomes more impulsive through single vehicles, windows are opened more often, especially in summer, and sleep makes noise more relevant subjectively. Mistake four: I hear nothing inside, so it is fine. That only applies if you use the apartment exactly the way you tested it. If you later want to sleep with the window open, a closed-window test is incomplete. Mistake five: the map only shows the big road, so everything else is irrelevant. In reality, intersections, turning lanes, or bottlenecks can acoustically dominate even if the street itself is not huge. The alternative is a two-stage process: first recognize patterns from data, meaning axes, zones, and neighborhood structure, and then test actual use on site, meaning bedrooms, balconies, and window logic. Anyone who combines both reduces surprises sharply.
- ✓ Do not assess the street category alone. Assess the actual use pattern, such as shortcut route, node, or peak load.
- ✓ Always treat the on-site check as a usage test for sleeping, working, and balcony use, not just as an impression.
- ✓ Combine map patterns with time windows: where is it loud, and when?
What Quiet Means for Different Target Groups: A Practical Framework
For the road-noise check to work across target groups, it helps to use a framework that does not judge morally but reflects actual use. For families, priority is often sleep in children’s rooms and safe, calm outdoor spaces. What matters is whether the children’s room faces the burdened side and whether play or outdoor stay areas are affected by traffic noise. For renters in general, the decisive factor is predictability. If noise restricts use, for example home office, balcony, or sleep, the apartment quickly becomes harder to live in, even when other criteria fit. For buyers, long-term value matters in addition to personal comfort. Noise is a location constant that can affect future demand, especially if comparable alternatives exist in quieter zones. For investors, noise becomes a risk when it leads to longer marketing times, higher turnover, or price discounts. In such cases, the map is above all a comparison tool: how does this address stand within its competitive environment? For agents, the value lies in explainable classification. Instead of saying it feels quiet, you can explain the location through clear patterns: axis, corridor, inner position, or neighborhood level. The goal is not to lead everyone to the same conclusion, but to allow each person to translate the same data basis into their own priorities.
- ✓ Do not define quiet absolutely. Define it by use, such as sleep, work, balcony, or children’s room.
- ✓ For purchases and investments, evaluate noise as a location constant within the competitive context.
- ✓ For client communication, explain patterns such as corridor, inner position, and neighborhood level instead of subjective labels.
How to Compare Road Noise Objectively, Even Across Several Apartments
The real gain appears when you do not examine only one address, but compare two or more locations using the same logic. To do that, proceed consistently. First, look at the immediate surroundings and the neighborhood for every address so you can distinguish house-level effects from the broader district backdrop. Second, pay attention to the burden pattern: is the address in a higher class, or is the burden mainly corridor-like along an axis? Are there potentially quieter inner areas? Third, complement the map with a standardized on-site check, for example always standing still for ten minutes, always checking the window logic, and always including an evening time slot. Fourth, document the results as simple decision statements, such as apartment A: neighborhood overall quieter, but balcony toward the axis, versus apartment B: neighborhood livelier, but bedrooms facing the courtyard. This creates a fair comparison: not that one apartment is good, but that one apartment fits your quiet profile better.
- ✓ Standardize the comparison with the same criteria, the same time windows, and the same observation steps.
- ✓ Record the burden pattern, meaning area-wide versus corridor-like, and connect it to room orientation.
- ✓ Phrase the result as a concrete, use-based decision statement, not as a general verdict.
The Limits of Models, and How to Still Reach a Robust Decision
Road-noise models are excellent for making structural differences between locations visible. At the same time, no model replaces real usage experience. A pragmatic approach is therefore this: use maps as an early-warning system and as a comparison basis, then confirm the relevant points on site. Especially for sensitive requirements such as light sleep, small children, or extensive home office, it is worth also talking to neighbors or being on site briefly during typical peak periods. Another important point is to separate road noise from other sources. Road-noise maps target traffic sounds from roads. Other sources, such as nightlife districts, courtyard restaurants, or construction sites, usually require additional checks. The report itself also notes that despite efforts toward quality control, the accuracy and completeness of the data and the reliability of the models cannot be guaranteed in every case because of the large amount of analyzed information. The sensible consequence is not distrust, but a clean process: data for structure plus on-site checks for reality. That makes the decision robust. You minimize surprises without getting lost in perfectionism.
- ✓ Map equals structure, on-site equals reality. Combine both instead of replacing one with the other.
- ✓ Separate road noise from other sources and check them deliberately as a supplement.
- ✓ If sensitivity is high, plan additional verification in peak periods, with neighbors, and for indoor and outdoor use.