Location Analysis Checklist: What to Look for When Buying Real Estate
This checklist shows step by step how buyers and investors can assess a residential location objectively, from accessibility and street noise to green space, land use, and soil sealing. It explains how to interpret typical maps and metrics from a location report in order to identify risks and compare locations fairly.
12.03.2026
Why a Location Analysis Is Essential Before Buying
When buying real estate, not only the layout, condition, or price matter. Above all, the location determines whether everyday life will actually work and whether the value will remain stable over the long term. The problem is that many location factors are hard to recognize during a viewing. A street may seem quiet at 2 p.m. but be loud during morning rush hour. The park may be “just around the corner,” yet still feel too far away in daily life. The apartment may seem bright, but receive significantly less daylight in winter due to shading. A systematic location analysis translates such impressions into verifiable criteria. The goal is not to label a location as “good” or “bad,” but to describe it in a way that allows you to compare it fairly with other addresses. That is exactly what data-based location reports are for: they bundle several modules, such as accessibility, noise, green space, and land use, in a consistent structure. This makes it clear which location fits your priorities and where potential risks lie. It is important to distinguish between macro-location and micro-location. Macro-location refers to the city or region, for example infrastructure, the labor market, and demand. Micro-location refers to the specific address and its immediate surroundings. Many poor decisions happen because people only look at the macro-location, “good city,” and underestimate the micro-location, such as noise exposure, sealing, or lack of green space. This checklist takes you step by step through the most important location factors. Each step explains how to read typical visualizations in location reports and what buyers and investors should watch for in order to avoid unpleasant surprises after moving in.
- ✓ Assess macro-location and micro-location separately (city/district vs. specific address)
- ✓ Define your own priorities in advance (time, quiet, greenery, light, surroundings)
- ✓ Compare at least two alternatives using the same criteria and the same logic
Step 1: Accessibility & Everyday Life - Compare Travel Times Objectively
Accessibility is one of the strongest levers in daily life: it determines how much time and stress disappear into transportation each week. For families, it often comes down to the combination of work, school or daycare, leisure, and daily errands. For investors and landlords, it affects how large the target group is that perceives a location as “practical.” Location reports often use isochrones for this purpose. Isochrones are map areas that show which places can be reached from a starting point within a defined time period, usually in minutes and separated by mode of transport, such as bicycle, public transit, car, or walking. The advantage is that they compare not just “distances,” but realistic travel times. A short straight-line distance can mean a long commute in practice if bridges, rail lines, or detours make the route longer. Here is how to read isochrones in practice: first, look at the shape. A uniformly “round” isochrone often suggests a well-connected route network. Bulges show fast corridors, such as a direct bike route. One-sided constrictions indicate barriers, such as a river without a crossing, a highway, or a hillside. In the second step, check whether your daily destinations, such as work, school, the train station, or shopping, fall within your personal time windows. The interpretation differs by target group. Families often prioritize reliability, for example arriving at childcare on time, and multimodality, meaning car, bike, and public transit as backup options. Tenants often pay more attention to public transit options. Investors look at whether an address performs well across multiple isochrone scenarios, because that increases lettability. One important point: isochrones are a model. They represent typical conditions, not every exceptional situation. For the final decision, it is worth testing the most critical routes in real life once, during rush hour, bad weather, or weekend service.
- ✓ Define 3-5 daily destinations (work, school, station, shopping, leisure)
- ✓ Set time limits for each destination (for example work <= 35 min, school <= 15 min)
- ✓ Review isochrones by transport mode and include backup options
- ✓ Test critical routes during rush hour as a reality check
Step 2: Street Noise & Traffic - How to Interpret Noise Maps Correctly
Street noise is one of the most common reasons for dissatisfaction after moving in, and at the same time one of the factors most easily underestimated during a single viewing. That is why noise maps are so valuable in location reports: they provide a visual estimate of potential noise levels in the area. A typical road-noise map model derives likely noise exposure from several influencing factors. In the model logic, features such as speed limits, road types, and information about surrounding buildings often play a role. The map then shows areas where higher levels can be expected because of proximity and traffic density, and areas that are comparatively quieter. Here is how to read the map systematically. First, identify the “sources”: main roads, through-streets, highway feeders, and intersections. High exposure often arises not only directly on a major road, but also at junctions and in acceleration and braking areas. Second, understand the spread: noise does not spread in a circular pattern, but is influenced by buildings. Closed perimeter blocks can shield inner courtyards, while more open development can carry sound farther. Changes in elevation also matter. Third, check the micro-location: two apartments in the same building can be affected differently. What matters is orientation, street side versus courtyard side, floor level, window quality, and balcony position. The map is the starting point; micro-details determine the actual living comfort. Fourth, account for the time dimension: traffic patterns change. For families, morning and afternoon periods, such as school runs, matter. For many tenants, nighttime noise and sleep quality are especially critical. A data-based view should always be supplemented by an on-site check at different times of day. For investors, noise is also a market factor: it affects demand, rent discounts, and vacancy risk. For owner-occupiers, it is above all a quality-of-life issue. In both cases, the rule is the same: noise is not just “loud or quiet,” but a spectrum, and the map helps make that spectrum visible across space.
- ✓ Mark main traffic corridors and intersections on the map
- ✓ Check apartment orientation (street side/courtyard side, balcony, bedroom)
- ✓ On-site check: morning + evening + late (at least 2 time windows)
- ✓ Build in a buffer: also check side streets and shortcuts as noise sources
Step 3: Green Space & Tree Cover - Proximity, Quality, and Shading Effects
Green space is more than just “nice to have.” It affects recovery, microclimate, air quality, and the leisure value of a location. For families, nearby play and movement options matter. For working professionals, a park near the home can be a real everyday buffer. For investors and agents, green space is often a stability factor because such locations tend to be in above-average demand in many markets. Location reports often use green-space maps, such as biodiversity or vegetation maps, for this purpose. They show the density of planted areas in a region as a visual distribution, often in a green color scale that makes areas with high or low green-space density easy to identify at a glance. Here is how to interpret such maps in practice. Density versus accessibility: a very green zone adds little if it cannot be reached conveniently in everyday life. So also pay attention to the “minimum distance to the nearest green space.” This metric helps assess leisure value more realistically. Type of greenery: not every green area is equally usable. A natural riverbank, a cemetery, an allotment area, or a park each offer different usage qualities. The map provides the structure; the details are clarified by a short on-site visit. Shading from tree cover: this is an important and often overlooked point. Very high tree cover close to the property can create problematic shade. For some people, that is pleasant in summer. For others, it means darker interior spaces or a damper microclimate. Green space should therefore always be considered together with daylight and shading. Different target groups emphasize different aspects. Families focus on safe, nearby play and activity spaces. Tenants check whether the location offers access to greenery without needing a car. Investors look at whether green space supports lettability and value stability, and whether the quality of greenery is durable, because public parks are more stable than temporary vacant lots.
- ✓ Check the minimum distance to the nearest green space (walkable for everyday use)
- ✓ Compare surrounding green-space density (a “green” map is not the same everywhere)
- ✓ Check tree cover near the property (summer shade vs. winter light)
- ✓ Briefly verify usability (park type, paths, safety, lighting)
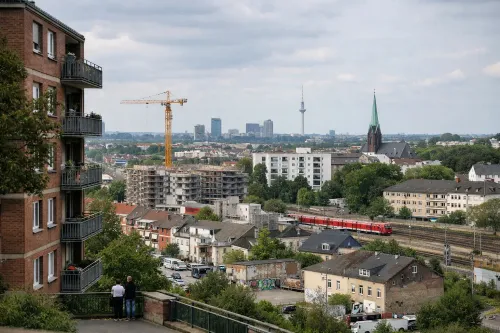
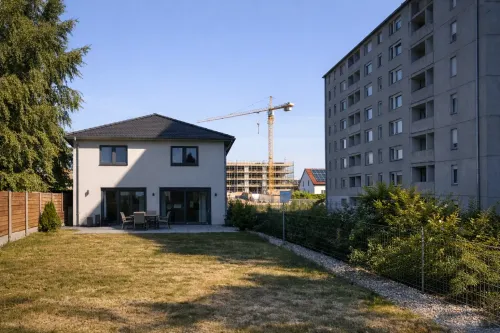
Step 4: Land Use & Soil Sealing - What the Surroundings Reveal About Living Quality
Land use describes what surrounding areas are used for, for example housing, commercial activity, agriculture, or industry. In location reports, this is often prepared as a land-use map in which areas are classified and shown proportionally. That helps you understand the surroundings not only by feel, but structurally. Why is this relevant? Because usage patterns strongly shape how a neighborhood feels and develops. A high share of mixed structures can mean short distances and variety, but it can also bring more traffic and activity. Commercial units can provide jobs and amenities, but also noise, delivery traffic, or emissions. Agricultural land can feel green and open, but depending on the context it can also bring seasonal activity or odors. Closely related is the topic of soil sealing. Soil sealing means covering land with impermeable materials such as concrete or asphalt. Natural soil functions are lost as a result, water infiltrates less effectively, and less filtration takes place. This can affect both the environment and quality of life, for example through increased summer heat or runoff during heavy rainfall. In soil-sealing maps, two things are usually especially important. First, the amount or degree of sealing in the surroundings: this is an indicator of building density and surfaces that can heat up. Second, the minimum distance to areas with low soil sealing: this is practical because it shows how quickly you can move from a heavily built-up, “hard” environment to softer, often more pleasant areas. Interpretation without shortcuts matters. High sealing is not automatically “bad.” It can indicate central locations with excellent infrastructure, with clear advantages for accessibility, target-group breadth, and lettability. What matters is whether the location matches your usage profile. If you spend a lot of time outdoors or value a cooler microclimate, you will often weight lower sealing more heavily. If you prioritize maximum centrality and short distances, you may accept more sealing, but then consciously secure other factors such as a courtyard, balcony, or park proximity.
- ✓ Check land use in the surroundings (housing/commercial/industry/greenery/mix)
- ✓ Assess the degree of soil sealing as a microclimate indicator
- ✓ Check distance to low-sealing areas as recreation and climate buffers
- ✓ Make the trade-off explicit: centrality vs. environmental comfort
Step 5: Bring the Results Together - Turning Data into a Decision
The biggest strength of a location analysis emerges when you do not look at individual values in isolation, but at how they interact. One location may be weaker on noise, yet still work for everyday life because it has a courtyard position and good windows. Another location may be extremely quiet, but cost time every day because of longer travel routes. A third location may be very green, but offer less daylight because of tree cover and surrounding buildings. In practice, the decision works in three steps. First, define “knockout criteria.” These are points you do not want to compensate for, for example a bedroom facing a main road if you are sensitive to noise, or commute times above a fixed limit. Second, define weightings. Families often give more weight to childcare or school, evening quiet, and green space. Working professionals prioritize travel time and public-transit flexibility. Investors weight lettability, target-group breadth, and risk factors, such as permanently noisy surroundings, more heavily. Third, make locations comparable. Use identical modules for each address. This is exactly where a standardized location report shows its value: it ensures that you do not look at noise for Property A and green space for Property B, but at the same set of criteria for both. In the end, the “best” location is not the one with the highest maximum values, but the one with the best fit for your everyday life, your risk appetite, and your time horizon. Data helps make that fit transparent.
- ✓ Define knockout criteria (for example max commute time, minimum quiet, minimum green proximity)
- ✓ Set weightings based on the goal (owner-occupancy vs. rental vs. investment)
- ✓ Compare at least 2-3 locations using identical modules
- ✓ Validate the most critical points on site (noise times, green access, routes)